Creating FIRE & ICE Effect in Photoshop – Part 1
Creating FIRE & ICE Effect in Photoshop – Part 1
Creating FIRE Effect:
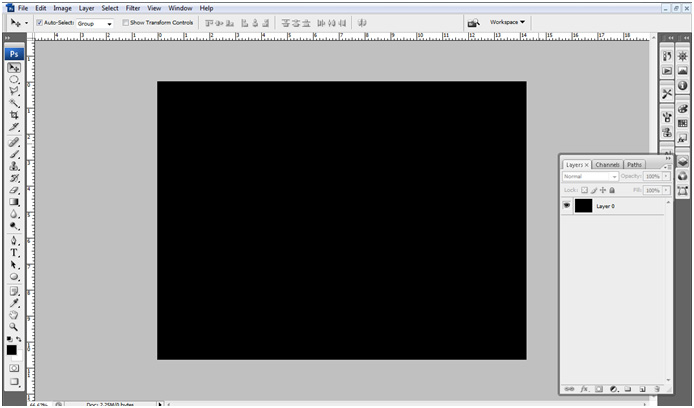
Select a new file with background color black
Type the text you want to, I have typed “FIRE” with font style Impact. Change the color
of the text to white.
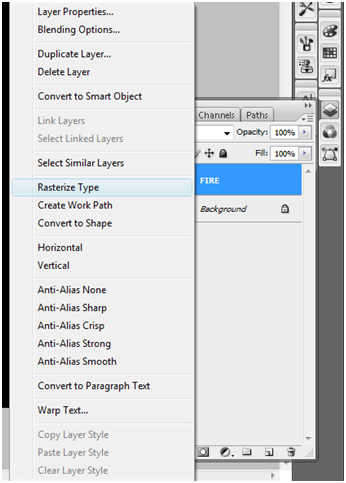
Rasterize the text layer and then merg down to the background.
Now go to the menu Filter>Stylize>Solarize
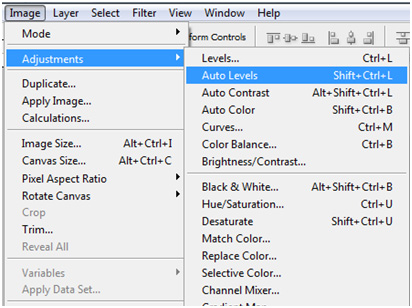
Go to menu Image>Adjustments>Auto Levels
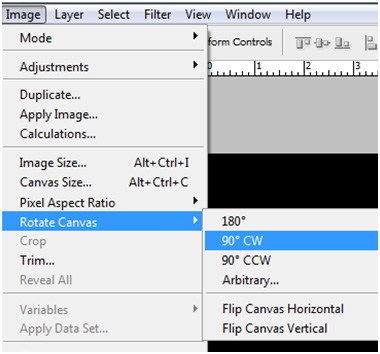
We will now rotate the canvas in clockwise direction.
Go to menu Image>Rotate Canvas>90° CW
Now, give the wind effects from the Filter.
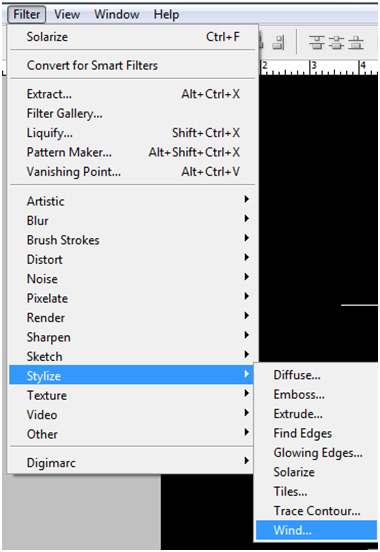
Go to menu Filter>Stylize>Wind
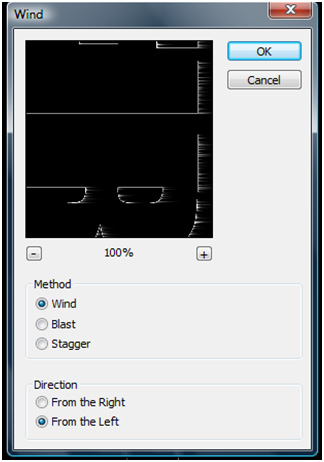
Now select “Wind” option from Method tab and “From the Left” from the Direction tab.
Repeat the same step for 3-4 times. I have repeated it 5 times.
Now, rotate the canvas to its original position.
Go to menu Image>Rotate Canvas>90° CCW.
We will now give some ripple to the image.
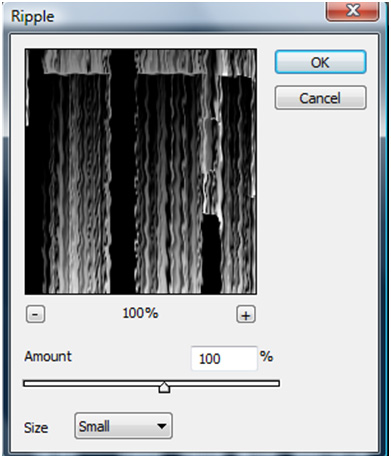
Go to menu Filter>Distort>Ripple
Select the Size as Small and Amount as 100%.
Now is the part where we begin to Give the Text a look of fire.
Now to keep the file size in Control and get hold of that unique color mode titled “Color Table”,
this is what we need to do.
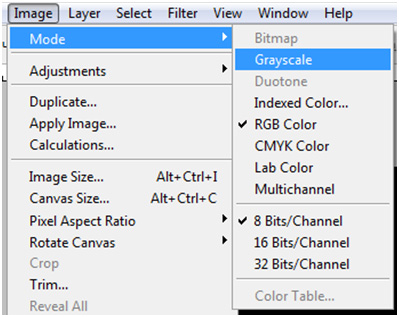
First, convert your file to Grayscale. This brings down the file size a lot.
Now, to get that magical color table (the one at the bottom of the above image – not highlighted),
we first need to convert the mode of the file to Index Mode.
Select the Discard from the message that will appear
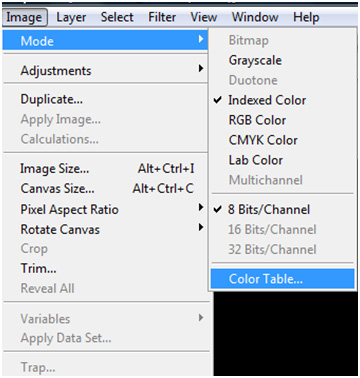
Convert the color mode to Index Color. Go to menu Image>Mode>Index Color
Now we will change the color scheme of the Index color and use the Color Table which is available for selection.
Go to menu Image>Mode>Color Table
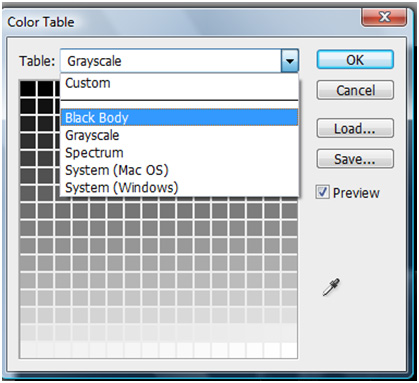
After this, select the Black Body option from the Color Table’s drop down menu.
The image now looks like this.
The Black Body option once selected, will give you Your Effect.
We will now give some glow to the fire but before that, since our color mode is in Index Color,
the Filter gallery will not work, so we have to change the color mode to RGB again.
Go to menu Image>Mode>RGB Color
Now we can give the effects what we want.
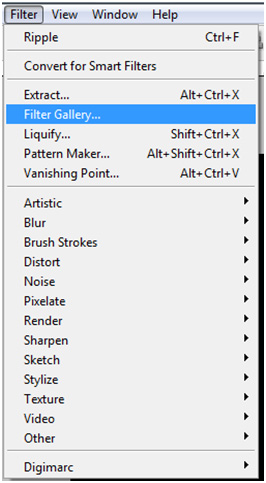
Go to menu Filter>Filter Gallery
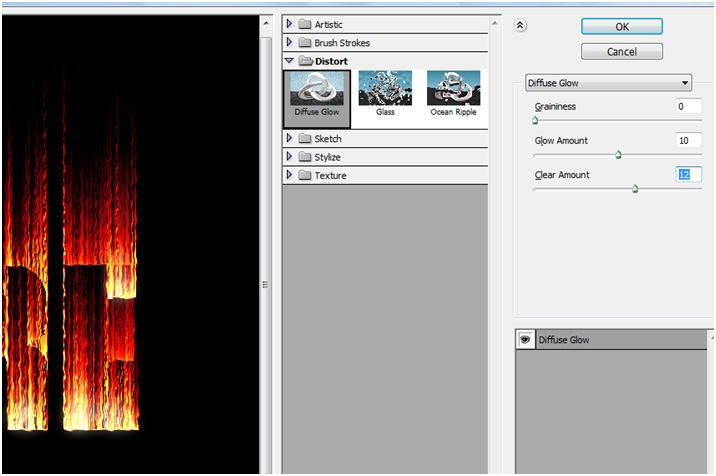
Select Distort from the Style Menu and under that select Diffuse Glow.
Set the values
Grainness – 0
Glow Amount – 10
Clear Amount – 12
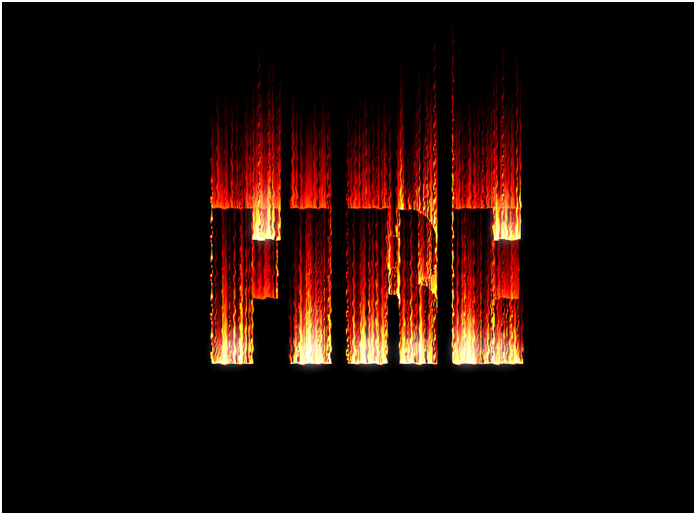
That the final step and our image looks like this
We are through with the PART – 1 Of the Tutorial.
Now to create ICE effect: Click Here for Part 2
Meanwhile, You can also Stay Updated With Us Here: Subscribe For Free
Connect with us On:
Also, do write to us for any queries or views or comments:
admin@techdivine.com
—-
Yasir A
Designer

