Text on FLAMES: Photoshop Effects Tutorial
Fire Text Effect Part 2
We have seen in the previous tutorials FIRE how to create fire on text, but in this tutorial, we will be using Adobe Photoshop and create the Text Effect to be precisely in flames.
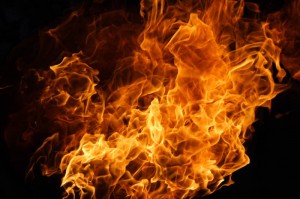
In this tutorial you will need a resource file for fire. Well, You can either search the net or just save the image of fire which is in the later part in this tutorial. (Titled FLAMES) numbered as Fig 8. below.
You Can click On Most of the Images for an ENLARGED Zoomed View
First of all take a new document with 300 resolution and black background.
Type a text you wish to, here again I am using the “TD”. Select a good smooth font you prefer with size 200pts and color white.
fig1

Step1
Go to blending option for the text you typed and in there select Outer Glow and set the values as shown under
fig2
(Color code #f70603)
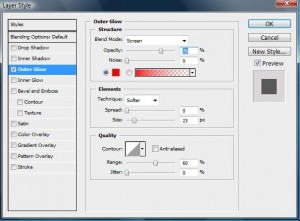
Step2
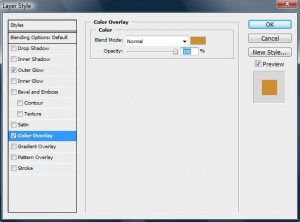
Now select Color Overlay and set the values as below in the image.
fig3
(color code #cd8f2f)
Step3
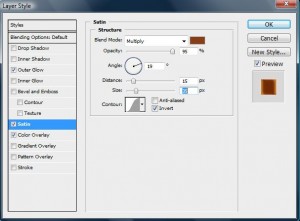
Select Satin now and do the changes as shown below in the image.
fig4
(color code #883f19)
Step4
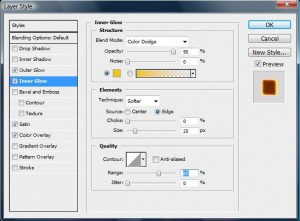
Now select Inner Glow with the settings shown below.
fig5
(color code #f0c41b)
Step5
Now we will Rasterize the text layer since the blending part is done.
Right Click on the text layer and select Rasterize Type.
Now select Eraser tool and set the brush size to 450px and make it softer. Set the flow value to 95 and erase off the top portion of the text. See below for example.
fig6

Step6
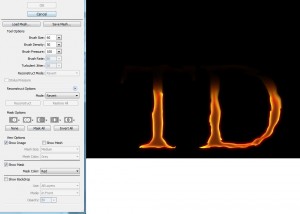
We will now distort the shape of our text.
Go to menu Filter>Liquify, select the Forward Wrap tool and set the settings as below and make the shape some what like shown under.
fig7
Now is the time to use the resources file as I mentioned in the very beginning. Below is the file which I am using. You can save it for working further in this tutorial or search through net for a different image.
fig8
[Img src: Fire image file used in tutorial available on shaedsofgrey.deviantart.com ]
Step7
Open the fire file in Adobe Photoshop and go to the channels tab and select only the green layer.
Now pressing Ctrl click on the green layer to get a selection of green colors.
fig9
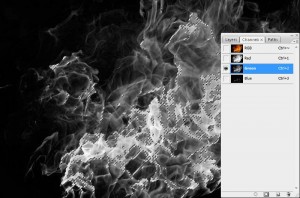
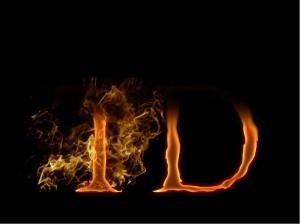
With the selection still active select the RGB layer, go back to the layers tab and make a copy of the selection and paste it in the document we are working with.
fig10
Step8
Take Eraser tool of 45px and Flow of 60% erase out the excessive flames leaving those covering the text.
fig11

Duplicate the flame layers, set Opacity to 30% and the blend mode to Overlay
Step9
Repeat the step7 and step8 until you get a nice flame of your choice. You can select the red channel from the flame file and repeat the same.
Final output of this tutorial
fig12
Stay Creative
For More Such Tutorials & Freebies Updates: CONNECT With Us Here:
Tweet with Us @techdivine Here
Join Us in Facebook Page: Techdivine Creative services Here
Join Us in Facebook Group Here
————–
Related Posts:
How to Create Rain Effect with Photoshop

