Creating a Stunning Rays Text Effect in Photoshop
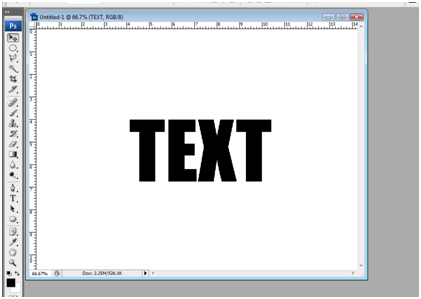
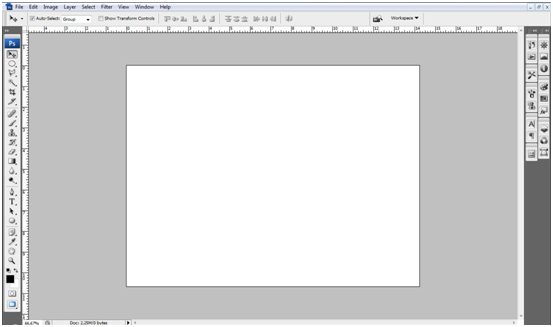
In this tutorial we will learn how to make ray effects coming from behind a text. Take a new file with white background.
Type any word you like, I have typed “TEXT”, select a font with bold nature, I have selected “Impact” font. To start with, try this tutorial with the same font.
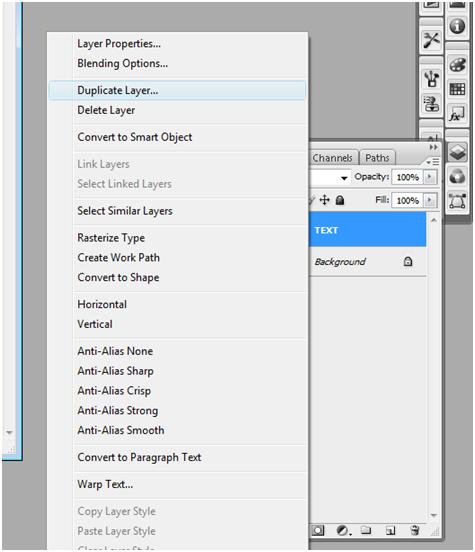
Now, make a copy of the layer “TEXT”
Go to layers panel, right click on the layer “TEXT”, select Duplicate Layer and hide the new layer which u just duplicated.
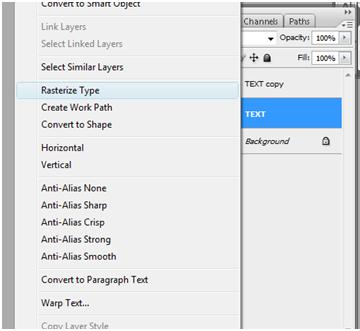
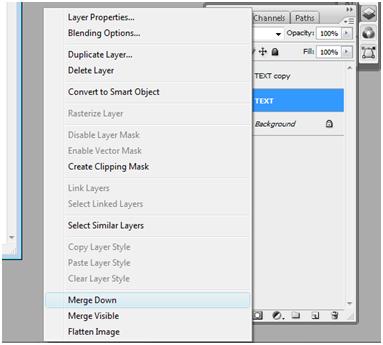
Now rasterize the layer “TEXT” and merge down with the background layer.
Now, we start up with the main part of our work. With the layer background still selected, give the solarize effect.
Go to menu Filter>Stylize>Solarize.
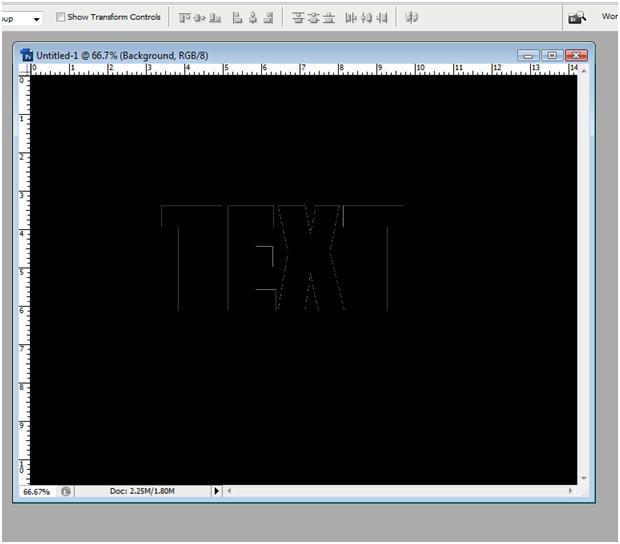
Then Go to Image – Adjustments – Auto Levels. Click on Auto Levels that will give your Text a white coloured outline.
Your image should now look somewhat like this.
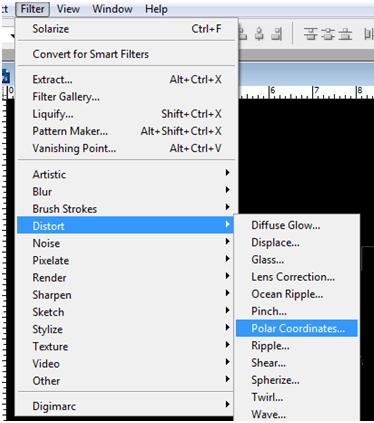
Now we will apply Polar Coordinates to this
Go to menu Filter>Distort>Polar Coordinates
Select the option Polar to Rectangular
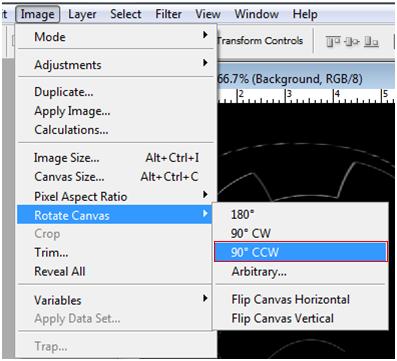
Your image will be stretched and distorted, but don’t worry, we will come back to the original shape in our further steps, but first we have to rotate our canvas 90° anti clock wise.
Go to menu Images>Rotate Canvas>90° CCW
Now, we will apply some wind effects to our image.
Go to menu Filter>Stylize>Wind
Select ‘Wind’ option from Methods and from the Directions select the option ‘From the Left’
Repeat the same step so as to get the rays like effect look more. I have repeated three times to get that perfect rays like effect. This is how the image is now looking.
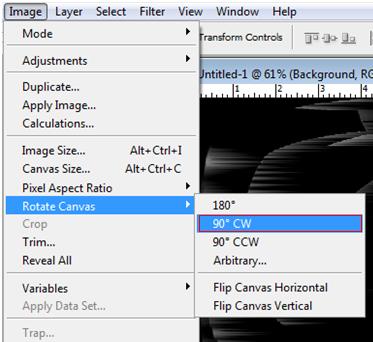
Go to menu Image>Rotate Canvas>90° CW
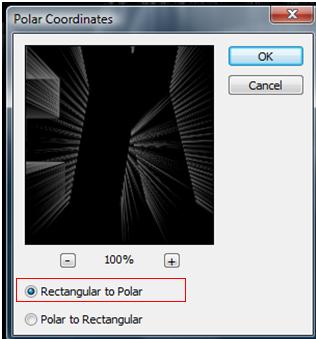
Now we have to make our image look like it was earlier. So go to menu Filter>Distort>Polar Coordinates and select the option ‘Rectangular to Polar’
Now we are back with our original shape with rays coming out
The image should now look like this
We will now give some color effect to the rays.
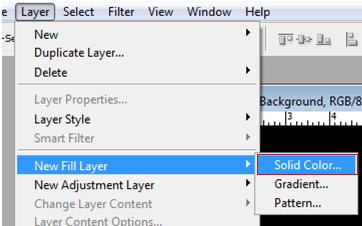
Go to menu Layer>New Fill Layer>Solid Color.
Just select ok in the New Layer option and select any color from the color palette, i have chosen orange shade #f06f21.
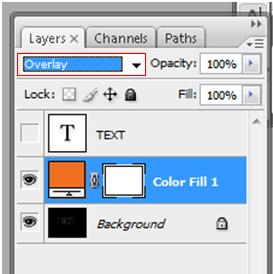
Change the blending mode to whatever you feel good with the effect, here i have selected Overlay.
Now, our work is almost over. Now, make the duplicated Text layer visible.
Change the font color of the text that suites you best,I have chosen white.
And that’s the final output
You can Add Multiple repeats of Wind and then brighten your Text with richer and more radiant colour / fill / pattern or even Gradients to create Your very own Stylized Text Effect. Note, this can be applied even to shapes for different effects.
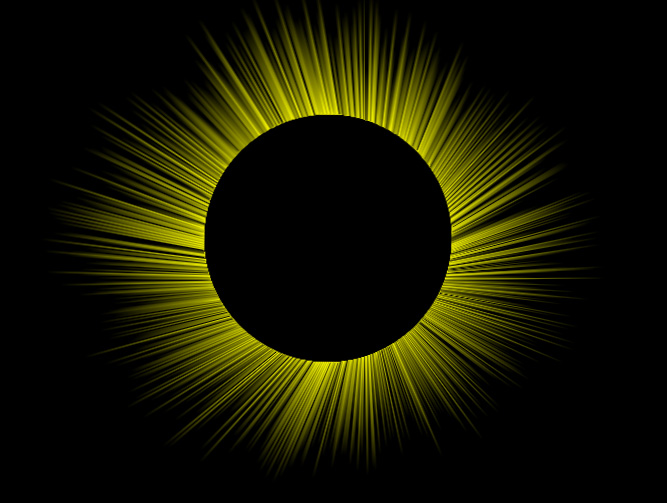
Sample Tutorial Effect on a Shape:Circle – Sun Blast / Eclipse Rays image attached below:
Hope you liked this tutorial.
More coming soon…. Keep reading.
Stay Updated With Us Here: Subscribe For Free
Connect with us On:
Also, do write to us for any queries or views or comments:
admin@techdivine.com
————
Thank You.
—-
Yasir A
Designer
Now, we will apply some wind effects to our image.
Go to menu Filter>Stylize>Wind
Select ‘Wind’ option from Methods and from the Directions select the option ‘From the Left’

